Propagation methods of Garden Croton
Written by Maggie
Jan 08 2021

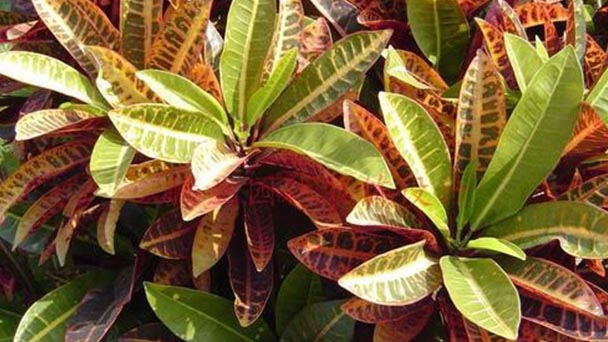
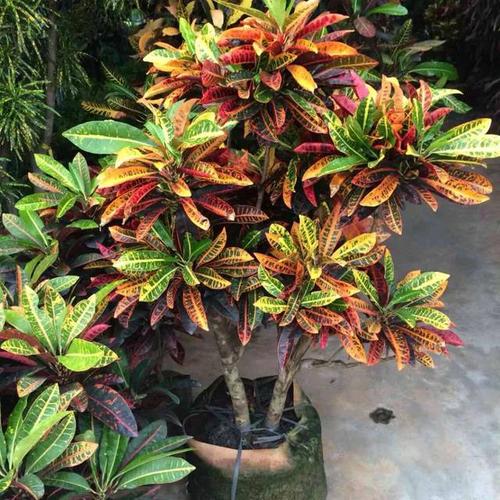
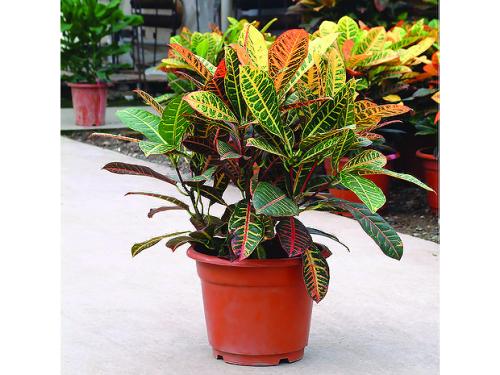
There are many varieties of Garden Croton, and its leaf color changes a lot. It is often used in some advanced places, and it can add an exotic style when placed on the desk. Many flower lovers want to propagate Garden Croton by themselves when cultivating it. Here are three common propagation methods of Garden Croton.

Seed propagation methods of Garden Croton
Seed selection
Before sowing, seeds should be selected first. Whether the seeds are selected well or not is directly related to the success of sowing.
1. It is better to choose the seeds that are harvested in the same year. The longer the seed is preserved, the lower the germination rate is.
2. The selection of full grain, no incomplete or deformed seeds.
3. Choose seeds that are free from diseases and insect pests.
Disinfection
Disinfection includes two concepts, one is the disinfection of seeds, the other is the disinfection of the substrate used for sowing. Family seed disinfection commonly used 60℃ or so hot water immersion seeds for a quarter of an hour, and then used warm water to accelerate bud 12 ~ 24 hours. The best way to disinfect the substrate used for sowing is to put it in a wok and fry it hot. Any disease or insect can be scalded to death.
Sprouting
Soak the seeds in warm water (about the same temperature as washing your face) for 12 to 24 hours until they absorb water and swell. For seeds that germinate easily, which are very common, this can be avoided.
Sow
For by hand or other tools hard to clamp the tiny seeds, can put the toothpick wet with water, at the end of the stick a grain by a grain of the seeds on the surface of the substrate, the substrate 1 cm thick, then the planting flower pot into the water, the depth of the water for the flower pot 1/2 ~ 2/3, the height of the water soak up slowly (the method known as "basin leaching method").
For larger seeds that can be picked up by hand or with other tools, place the seeds directly in the matrix and sow at intervals of 3 x 5 cm. After sowing, the substrate was covered and the covering thickness was 2 ~ 3 times of seed grain. Spray can be used after sowing, fine hole flower sprinkles to sow matric qualitative wet, later when basin soil is slightly dry again dowsing water, still should pay attention to the intensity of watering can not be too big, so as not to rush up the seeds.
Management after sowing
In late autumn, early spring or winter after sowing, when the cold wave low temperature, we can use plastic film to wrap up the flowerpot, in order to heat preservation and moisture. Expose the membrane to the sun before 9:30 a.m. or after 3:30 p.m., otherwise the seedlings will grow very weak. When most of the seeds have come out, the seedlings should be thinnest properly: the sick and unhealthy seedlings should be pulled out, so that there is a certain space between the remaining seedlings. When most seedlings have three or more leaves, they can be transplanted.

Cutting propagation methods of Garden Croton
Cutting propagation methods of Garden Croton are often in the late spring early autumn of the current year of the branches for young cuttings, or in early spring of the last year of the branches for cuttings.
Substratum
It is used for cutting nutrient soil or river sand, mud carbon soil and other materials. It is difficult to get the ideal cutting substrate under the condition of family cutting. It is suggested to use the prepared and sterilized cutting substrate provided by this station. Medium and coarse river sand is fine, but flush with water several times before use. Do not use river sand from sea sand and saline-alkali areas. They are not suitable for the growth of flower plants.
Choice of cuttings
When carrying on the twig cutting, in the late spring to early autumn when the plant growth exuberant, chooses in the year the robust branches as the cuttings. After cutting the branch, select a strong place, cut into 5 ~ 15 cm long, each section should take more than 3 leaf segments. When cutting the cuttings, it should be noted that the upper cutting edge is about 1cm above the top leaf node, and the lower cutting edge is about 0.5cm below the bottom leaf node. The upper and lower cutting edges should be flat (the knife should be sharp). When carrying on hard twig cutting, after early spring temperature rises, select last year's robust branch to make the cuttings. Usually 3 ~ 4 segments are kept in each segment, and the cutting method is the same as the cutting method.
Management after cutting
The temperature
The optimum rooting temperature was 20°C ~ 30°C, lower than 20℃, and the rooting was difficult and slow. When the temperature is higher than 30°C, the upper and lower cuttings of the cuttings are susceptible to bacterial infection and decay, and the higher the temperature is, the greater the proportion of decay will be. When low temperature occurs after cutting, the insulation measures are mainly used to wrap up the flower pots or containers used for cutting with film. Cutting temperature is too high temperature, cooling measures are mainly to give cuttings shade, to block out the sun of 50 ~ 80%. At the same time, spray cuttings, 3 to 5 times a day. In sunny temperature higher, the number of spray is more. In cloudy and rainy temperatures lower, spray is less or no spray.
Humidity
After cutting, the relative humidity of air must be maintained at 75 ~ 85%. The basic requirement of rooting in cuttings is to ensure that the cuttings are fresh and can be used to produce rooting materials before rooting. But not rooting cuttings is unable to absorb enough water to maintain the water balance in the body. Therefore, we must reduce the cutting by spray evaporation: under the condition of a shade, spray to the cuttings, 3 ~ 5 times a day, sunny day temperature, the higher the injection, the more spray rainy day temperature, the lower the number of less or not. But with too much spray, cuttings are susceptible to infection and decay, because many kinds of germs are present in the water.
Light
Cuttings cannot be propagated without sunlight because the cuttings have to continue photosynthesis to produce nutrients and rooting materials to supply their rooting needs. However, the stronger the light, the higher the temperature inside the cuttings, the more vigorous transpiration of cuttings, the more water consumption, not conducive to the survival of cuttings. Therefore, after cutting, you must cover up the sun 50 ~ 80%, to grow the root system, and then gradually remove the shading network: sunny every day at 4:00 p.m. remove the shading network, the next day before 9:00 a.m. Cover the shading network.

Layering propagation methods of Garden Croton
Choose a branch
Select robust branches, from the top tip below about 15 ~ 30 cm place bark stripped off a ring, strip after the wound width in a centimeter or so, the depth to just skin stripped off for the limit. Cut a piece of film 10 ~ 20 cm long and 5 ~ 8 cm wide, put some wet garden earth on it, wrap up the part of the ring stripping like a wound, tie up the upper and lower ends of the film and bulge in the middle. It takes about four to six weeks to take root. After taking root, you cut off the roots along the side of the branch to make a new plant.
Pot or transplant
Seedlings plate or have several years of big plant pots, in pelvic floor in the first 2 ~ 3 cm thick coarse grained matrix as a filter layer, cover it with full of rotten organic fertilizer as basal, thickness of about 1 ~ 2 cm, then cover with a thin layer of substrate, about 1 ~ 2 cm thick, and then into the plant, in order to separate the fertilizer from the root, avoid burning roots.
The substrate for the upper basin may be of the following type: garden soil: slag = 3:1. Or garden soil: medium coarse river sand: sawdust (shavings) = 4:1:2; Or paddy soil, pond mud, one of the leaf rot soil. After putting on the pot, pour water into it once, and keep it in the shade environment for a week. When transplanting the seedlings, dig the planting holes first and sprinkle a layer of organic fertilizer at the bottom of the planting holes as base fertilizer (base fertilizer) with a thickness of about 4 ~ 6cm. Then cover with a layer of soil and add the seedlings to separate the fertilizer from the roots and avoid burning roots. After placing the seedlings, backfill the soil to cover the root system, trample the soil with your feet and water it through once.

Latest Updated
- Benefits of Bugleweed - 7 Science-backed Health Benefits
- Bugleweed Dangers & Side Effects - Is It Poisonous?
- How to Plant Evergreen Trees - What You Should Know
- When to Plant Evergreens - Grow Guide for Evergreen Trees
- 12 Wonderful Evergreen Shrubs for Your Garden
- 12 Popular Evergreen Plants with Pictures for Beginners
- When And How To Prune A Lilac Bush Like a Pro
- How to Grow & Care for Lilac Vine (Hardenbergia Violacea)
- Japanese Lilac Tree (Syringa Reticulata) Care & Propagation Guide
- Shumard Oak Pros and Cons - What to Know
Popular Articles
- Winter maintenance of Antirrhinum Majus
- How to Grow Terminalia Mantaly Tree
- How to Grow and Care for Crossostephium Chinense
- How to grow Antirrhinum Majus in spring
- Peristeria Elata (Dove Orchid) Profile: Info & Care Guide
- Underwatered Snake Plant (Sansevieria Trifasciata) - Signs And How To Fix
- How to Care for Brazilian Jasmine Plant (Mandevilla Sanderi)
- How to Grow & Care for Graptopetalum Purple Delight in Summer
- Rosa Chinensis (China Rose): Plant Growing & Care Tips
- How to Care for Baby Sun Rose (Aptenia Cordifolia)