How to Propagate Balloon Flower
Written by Iris
Nov 05 2021

Balloon flower is such a solid performer in the garden that most gardeners eventually want to propagate the plant to create more of them for their yard. Like most perennials, propagating balloon flowers can be done in more than one way. Let's learn more about balloon flower propagation. Create new balloon flower plants by dividing existing mature plants, or by collecting the seeds in the fall and planting them the next spring. Using balloon flower seeds is very simple to do, but dividing the plants can be a bit trickier. Other propagation methods are not recommended for this plant. Some folks try to divide Balloon flowers. However, the divisions are rarely successful due to the inevitable root damage. Let's take a look at how to propagate Balloon Flower.
Start seeds indoors six to eight weeks prior to the last average spring frost date for blooms in the first year. Balloon flower seeds need light to germinate, so place them on the surface of moist soil without covering them. When the seedlings have two sets of true leaves and the danger of frost has passed, you may gradually acclimate them to the outdoors. Give them a few hours of fresh air and sunlight each day for about three to five days. This is a process called “hardening off.” After hardening off, you can transplant the seedlings to the garden, taking care not to disturb the fragile roots. Dig a hole the same depth and width as the root ball. Keep the soil surface of the seedling even with the ground soil surface, neither burying nor elevating the seedling, to minimize transplant stress. You may also direct sow seeds outdoors after the last average spring frost date, or at any time during the growing season, but they may not produce flowers until the second year. Moisten the soil and sprinkle your seeds every few inches throughout the planting area. Do not cover them. Maintain even moisture, but do not let the soil become waterlogged. This is the best balloon flower propagation method, as it will not put any stress on the delicate roots. For both methods, maintain even moisture but avoid oversaturation while seeds germinate and plants become established in the garden.

If you decide to plant the seedlings directly into the garden, you should dig a hole as deep as the root ball. The best option is that the hole is twice as wide as the plant's root.
When planting a few flowers at once, try to provide enough space between them. In fact, Balloon flowers look much better if you plant them in a group of three plants together.
Put the cut piece of your Balloon flower in that hole, fill it with the garden soil, and water it abundantly. Take care to keep the taproot 1 to 1.5 inches (2.5 – 3.8 cm) under the surface of the ground. Don't expect the new plant to begin blooming at least a season or two.
Balloon Flower Sowing PropagationBalloon Flower Cutting PropagationBalloon Flower Division Propagation
Balloon Flower Sowing Propagation
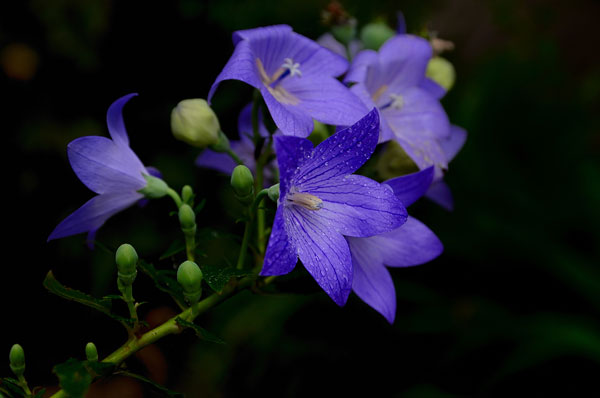
Balloon Flower Seeds Balloon flowers (Platycodon Grandiflorus) are named because their bloom starts out looking like a purple, white or blue balloon, then it pops open to a wide bloom. After the bloom dies off, you'll see a brown pod at the end of the stem. Wait until the stem and pod dry out completely, then snap the stem and place the pod into a paper bag. Once you break open the pods, you’ll find hundreds of tiny brown seeds that look like miniature grains of brown rice. Plant the balloon flower seeds in the spring when all chance of frost has passed. Choose a site that gets full sun to slight partial shade, and dig a 3-inch (7.6 cm.) layer of compost into the soil. Sprinkle the seeds on top of the soil and water them. You’ll see sprouts within two weeks. Keep the ground moist around the new sprouts. In most cases, you’ll get flowers in the first year you plant them. (Find more fall flowers here.)Start seeds indoors six to eight weeks prior to the last average spring frost date for blooms in the first year. Balloon flower seeds need light to germinate, so place them on the surface of moist soil without covering them. When the seedlings have two sets of true leaves and the danger of frost has passed, you may gradually acclimate them to the outdoors. Give them a few hours of fresh air and sunlight each day for about three to five days. This is a process called “hardening off.” After hardening off, you can transplant the seedlings to the garden, taking care not to disturb the fragile roots. Dig a hole the same depth and width as the root ball. Keep the soil surface of the seedling even with the ground soil surface, neither burying nor elevating the seedling, to minimize transplant stress. You may also direct sow seeds outdoors after the last average spring frost date, or at any time during the growing season, but they may not produce flowers until the second year. Moisten the soil and sprinkle your seeds every few inches throughout the planting area. Do not cover them. Maintain even moisture, but do not let the soil become waterlogged. This is the best balloon flower propagation method, as it will not put any stress on the delicate roots. For both methods, maintain even moisture but avoid oversaturation while seeds germinate and plants become established in the garden.

Balloon Flower Cutting Propagation
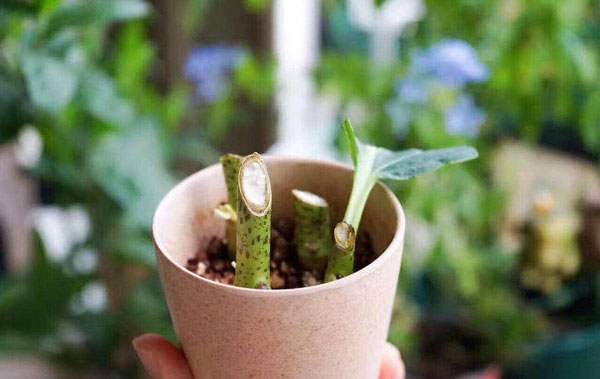
It is not a too hard way for the propagation of Balloon flowers. Wait for late spring to come and cut 2 to 4 inches (5 – 10 cm) long stems with garden pruners. You will get the best results when using stem joins the roots. Gently dig the soil to the place where they are connected and cut off a stem with a 0.5 inches (1.3 cm) long piece of root. Pot every cutting separately and keep it consistently moist. It will establish quite quickly. It seems that you will have almost 100% success when using cuttings that way. The probability of surviving cuttings dipped in rooting hormone is not higher than 50%. (Find more fall plants here.)
Balloon Flower Division Propagation
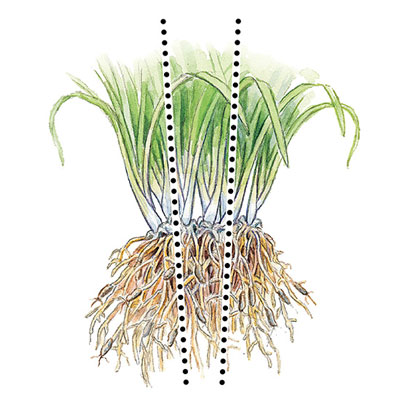
Balloon flower propagation can also be done by dividing the plants. Balloon flower has a complex and extended root system, which doesn't prefer being disturbed. Therefore, propagation by dividing is a quite tricky option without much chance of success. However, if you want to try this method, you should cut a piece of the root without uprooting the plant entirely. The best period for this action is at the end of the season. In any case, don't do it more than once in a decade. Take care to cut at least 0.5 inches (1.3 cm) of the root, so that the new plant can start growing. Pot the plant right away and water it well.If you decide to plant the seedlings directly into the garden, you should dig a hole as deep as the root ball. The best option is that the hole is twice as wide as the plant's root.
When planting a few flowers at once, try to provide enough space between them. In fact, Balloon flowers look much better if you plant them in a group of three plants together.
Put the cut piece of your Balloon flower in that hole, fill it with the garden soil, and water it abundantly. Take care to keep the taproot 1 to 1.5 inches (2.5 – 3.8 cm) under the surface of the ground. Don't expect the new plant to begin blooming at least a season or two.

Latest Updated
- Benefits of Bugleweed - 7 Science-backed Health Benefits
- Bugleweed Dangers & Side Effects - Is It Poisonous?
- How to Plant Evergreen Trees - What You Should Know
- When to Plant Evergreens - Grow Guide for Evergreen Trees
- 12 Wonderful Evergreen Shrubs for Your Garden
- 12 Popular Evergreen Plants with Pictures for Beginners
- When And How To Prune A Lilac Bush Like a Pro
- How to Grow & Care for Lilac Vine (Hardenbergia Violacea)
- Japanese Lilac Tree (Syringa Reticulata) Care & Propagation Guide
- Shumard Oak Pros and Cons - What to Know
Popular Articles
- Winter maintenance of Antirrhinum Majus
- How to Grow Terminalia Mantaly Tree
- How to Grow and Care for Crossostephium Chinense
- How to grow Antirrhinum Majus in spring
- Peristeria Elata (Dove Orchid) Profile: Info & Care Guide
- Underwatered Snake Plant (Sansevieria Trifasciata) - Signs And How To Fix
- How to Care for Brazilian Jasmine Plant (Mandevilla Sanderi)
- How to Grow & Care for Graptopetalum Purple Delight in Summer
- Rosa Chinensis (China Rose): Plant Growing & Care Tips
- How to Care for Baby Sun Rose (Aptenia Cordifolia)