Okra: Grow & Care for Abelmoschus esculentus
Written by Iris
Aug 04 2021
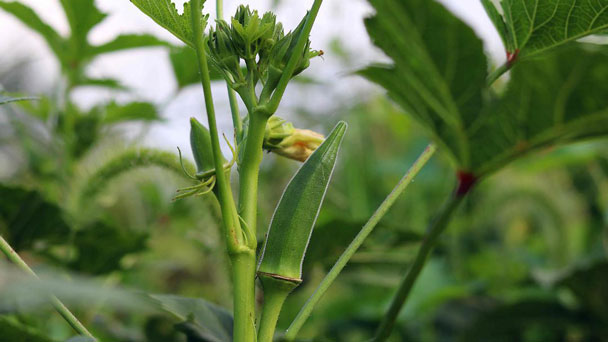
Okra (Abelmoschus esculentus) is a wonderful vegetable that can be used in a variety of soups and stews. Okra (Abelmoschus esculentus) has a lot of uses, but not many people actually grow it. Due to its multiple uses, there's no reason not to add this vegetable to your garden.
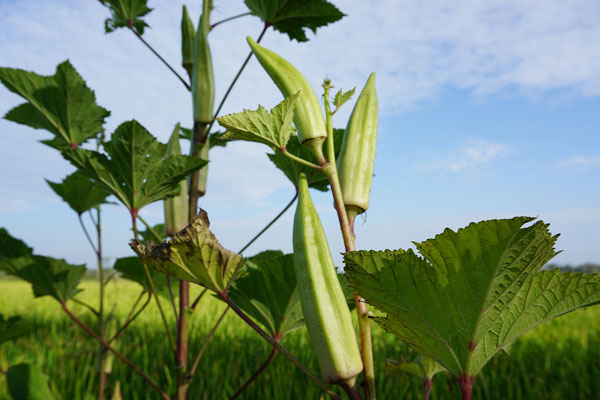
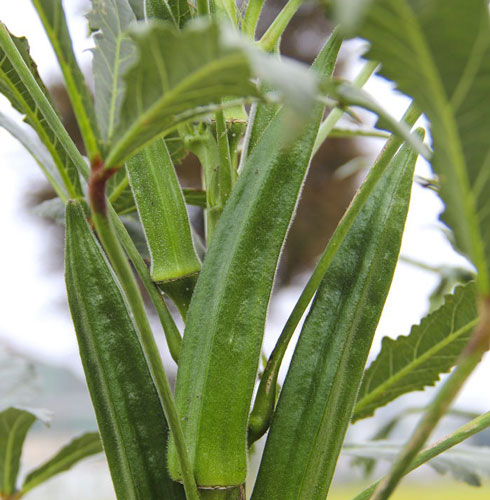
Overnight temperatures are also extremely important to Okra. If the temperature drops below 62°F at night even though the plants are flowering well they will not set pods. This is annoying in zones 6 and warmer where we may have a few days with lower nighttime temperatures but in colder zones it can make a lot of difference to crop yields. If you live in a colder zone and still want to grow okra using a poly house, greenhouse or high tunnel is the best recommendation for high crops. Under such conditions manual pollination may be necessary. In warmer zones okra can be sown in early spring for a first crop with a second sowing in June for a later crop if desired.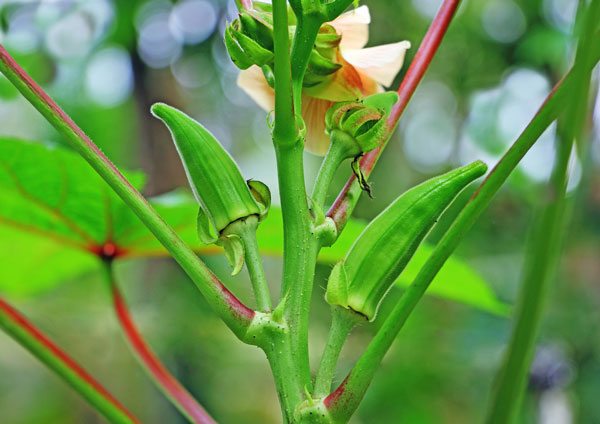
Keep an eye on your garden by walking through it each day, looking closely on the underside of leaves and on lower branches and stems for aphids and stink bugs. You may also catch them feeding on the juices of emerging pods. Keep in mind that beneficial insects such as ladybugs are your friends, and should be allowed to stay.
Keep an eye out for cabbage worms and flea beetles eating your okra leaves, and check the undersides of leaves for aphids, bug eggs and whiteflies. You can hand pick insects off of your plants or douse them with a steady stream of hose water to knock them off of the plants. In most situations, a combination of hand picking and dousing is all that’s needed to avoid a serious infestation.
A fungus known as fusarium wilt may sometimes occur where there is too much water provided or insufficient drainage. You will notice it by its telltale sign, which is drooping yellow leaves. Plants that have succumbed to this fungus must be removed and destroyed immediately, to avoid spreading it to other plants.
Anthracnose fungus is another possible issue with okra plants. Its presence is noted by black spots on leaves. Again, if the plant has been compromised by the fungus, you should remove any infected plants quickly to prevent further spread in the garden.
Powdery mildew, which causes white and powdery spots on plants, may also affect okra, especially when growing in humid and overly moist conditions. Remove affected portions of the plant, prune back all plants for good airflow, and always plant in well-draining soil.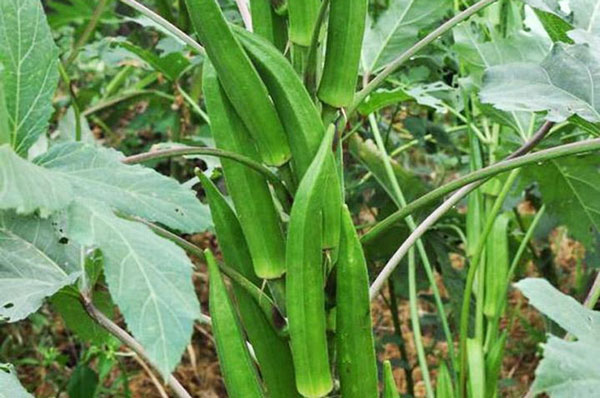
'Annie Oakley' is a hybrid plant that provides a nice yield. It grows 3 to 4 feet tall.
'Burgundy' is an heirloom variety that has deep reddish seed pods that lose some of the color with cooking. It grows to around 4 feet.
'Clemson Spineless' is an heirloom plant known for its good flavor. It is a larger variety, growing 4 to 5 feet high.
'Emerald' has especially long seed pods at 7 to 9 inches. It is a spineless heirloom plant that grows to around 4 feet.
'White Velvet' is another heirloom plant. It has tender white pods and grows to 5 feet.
How to Choose and Prepare a Planting SiteWhen to Grow Okra (Abelmoschus esculentus)How to Grow Okra (Abelmoschus esculentus)How to Care for Okra (Abelmoschus esculentus)Varieties of Okra (Abelmoschus esculentus)Okra (Abelmoschus esculentus) FAQ
How to Choose and Prepare a Planting Site
As a warm-weather crop, okra appreciates full sun. Okra is adaptable and will grow in most soils, though it performs best in well-drained soil that’s rich in organic matter. Soil should ideally be on the acidic side, with a pH between 5.8 and 7.0.When to Grow Okra (Abelmoschus esculentus)
You can start okra seeds indoors in peat pots under full light 3 to 4 weeks before the last spring frost date. In warmer areas, you can also start okra directly in your garden 3 to 4 weeks before the last spring frost date as long as you cover the plants with a cold frame or grow tunnel until the weather warms up fully. Make sure that the covering is 2 to 3 feet tall so that the plants have room to grow. If you do not start your okra plants early, wait until there is stable, warm weather. You can plant okra in the garden when the soil has warmed to about 65° or 70°F—the warmer, the better.
How to Grow Okra (Abelmoschus esculentus)
Steps for Okra (Abelmoschus esculentus) Propagation with Seeds
- Soak your okra seeds in water overnight the day before you plan on sowing them. The best time to plant okra seeds is roughly a week after the final frost of the season, when the average temperature of the soil reaches 65 degrees Fahrenheit.
- Test the soil in your garden to determine if it needs fertilization. In areas with poor soils, fertilize the planting area using 10-10-10 fertilizer applied over your garden bed. Apply 1 to 2 pounds of fertilizer for every 100 square feet of okra.
- Sow your okra seeds into raised mounds spaced 1 to 2 feet apart with 3 feet between each row. Align your rows facing east to west in a location that receives full sunlight throughout the day. Plant each seed 1 inch deep, with several seeds planted in each mound.
- Water each mound often enough to keep the soil moist to the touch without saturating it. Once the seeds have sprouted and reached a height of several inches, select the tallest plant in each mound and prune every other plant down to the ground. Continue watering the remaining okra plants often enough to prevent the soil from completely drying out.
- Apply additional fertilizer to the sides of the okra mounds at a rate of 3 ounces for every 100 feet of planting row. Make your second application of fertilizer when your okra reaches roughly 6 to 8 feet in height. Apply fertilizer again at the same rate three weeks later to promote steady growth.
- Begin checking your okra plants for harvestable pods 50 to 60 days after their initial planting date. The pods of your okra plants are ready to harvest when they are roughly 2 to 4 inches long. Check your plants daily for pods that are ready to harvest. Do not allow the pods to completely mature on the plants, because this slows production and decreases quality.

How to Care for Okra (Abelmoschus esculentus)
Light
The key ingredient in growing okra is SUN. Okra needs full sun. If this plant doesn’t get maximum light exposure while growing you will have poor quality okra.Soil
Have the soil tested to determine nutrient deficiencies and apply fertilizer and organic matter based on test recommendations. For most gardens, 2 to 3 pounds of 10-10-10 fertilizer per 100 sq ft or 0.5 to 1 inch of manure-based compost provides sufficient nutrients. Fertilizer or compost should be incorporated 3 to 6 inches into the soil before planting. Excess nitrogen when plants are small will cause increased vegetative (leaf) growth and decreases yield and pod set.Water
Once okra plants are established, they can handle brief dry spells. For best yields, water well at least every seven to 10 days if you haven't had rainfall. Keep the soil of young plants evenly moist but not soggy.Temperature
Okra will grow well in zone 6 and warmer with ease in colder zones ensure that it is in the best warm location possible to get the most crop possible. This is after all a semi tropical plant, and although the amount of warmth it gets is important the number of hours of bright daylight are also important.Overnight temperatures are also extremely important to Okra. If the temperature drops below 62°F at night even though the plants are flowering well they will not set pods. This is annoying in zones 6 and warmer where we may have a few days with lower nighttime temperatures but in colder zones it can make a lot of difference to crop yields. If you live in a colder zone and still want to grow okra using a poly house, greenhouse or high tunnel is the best recommendation for high crops. Under such conditions manual pollination may be necessary. In warmer zones okra can be sown in early spring for a first crop with a second sowing in June for a later crop if desired.

Fertilizer
Fertilize okra with a high-phosphate fertilizer, such as an 18-18-21 product diluted at a rate of 1 tablespoon per gallon of water, or according to the manufacturer's instructions. Feed plants every seven to 14 days. Switch to a 24-8-16 feed or similar high-nitrogen fertilizer when flowers appear at the top of the plant. Dilute the fertilizer at a rate of 1 tablespoon per gallon of water and apply every 14 days, or use according to the manufacturer's instructions.Pests and Diseases
Okra is not typically prone to pests or disease, but it is certainly possible. Practicing crop rotation will help immensely to help avoid potential issues. Using high quality seed, providing ample air circulation and appropriate moisture levels will also go a long way towards keeping your plants safe from pests and disease issues. Keep your vegetable patch clean, and promptly remove old plant debris like dead leaves and old vegetation.Keep an eye on your garden by walking through it each day, looking closely on the underside of leaves and on lower branches and stems for aphids and stink bugs. You may also catch them feeding on the juices of emerging pods. Keep in mind that beneficial insects such as ladybugs are your friends, and should be allowed to stay.
Keep an eye out for cabbage worms and flea beetles eating your okra leaves, and check the undersides of leaves for aphids, bug eggs and whiteflies. You can hand pick insects off of your plants or douse them with a steady stream of hose water to knock them off of the plants. In most situations, a combination of hand picking and dousing is all that’s needed to avoid a serious infestation.
A fungus known as fusarium wilt may sometimes occur where there is too much water provided or insufficient drainage. You will notice it by its telltale sign, which is drooping yellow leaves. Plants that have succumbed to this fungus must be removed and destroyed immediately, to avoid spreading it to other plants.
Anthracnose fungus is another possible issue with okra plants. Its presence is noted by black spots on leaves. Again, if the plant has been compromised by the fungus, you should remove any infected plants quickly to prevent further spread in the garden.
Powdery mildew, which causes white and powdery spots on plants, may also affect okra, especially when growing in humid and overly moist conditions. Remove affected portions of the plant, prune back all plants for good airflow, and always plant in well-draining soil.

Varieties of Okra (Abelmoschus esculentus)
Okra varieties that are labeled spineless are less irritating to harvest, but be aware that they are not completely spine-free. Consider these okra varieties:'Annie Oakley' is a hybrid plant that provides a nice yield. It grows 3 to 4 feet tall.
'Burgundy' is an heirloom variety that has deep reddish seed pods that lose some of the color with cooking. It grows to around 4 feet.
'Clemson Spineless' is an heirloom plant known for its good flavor. It is a larger variety, growing 4 to 5 feet high.
'Emerald' has especially long seed pods at 7 to 9 inches. It is a spineless heirloom plant that grows to around 4 feet.
'White Velvet' is another heirloom plant. It has tender white pods and grows to 5 feet.
Okra (Abelmoschus esculentus) FAQ
Where did okra originate from?
Okra is native to the Old World tropics (West Africa) and has become established in the wild in some New World tropical areas. It is believed that okra first reached the New World during the days of slave trafficking. Okra is a popular and important food worldwide.What can I plant next to okra?
Plants like kale, broccoli, cauliflower, Brussels sprouts, Swiss chard, and other brassica family members plant well with okra. They add nutrients to the soil which helps improve the health of your okra plants. Sunflowers. These flowers act as a companion plant to attract pollinators, allowing your okra pods to bloom.
Latest Updated
- Benefits of Bugleweed - 7 Science-backed Health Benefits
- Bugleweed Dangers & Side Effects - Is It Poisonous?
- How to Plant Evergreen Trees - What You Should Know
- When to Plant Evergreens - Grow Guide for Evergreen Trees
- 12 Wonderful Evergreen Shrubs for Your Garden
- 12 Popular Evergreen Plants with Pictures for Beginners
- When And How To Prune A Lilac Bush Like a Pro
- How to Grow & Care for Lilac Vine (Hardenbergia Violacea)
- Japanese Lilac Tree (Syringa Reticulata) Care & Propagation Guide
- Shumard Oak Pros and Cons - What to Know
Popular Articles
- Winter maintenance of Antirrhinum Majus
- How to Grow Terminalia Mantaly Tree
- How to Grow and Care for Crossostephium Chinense
- How to grow Antirrhinum Majus in spring
- Peristeria Elata (Dove Orchid) Profile: Info & Care Guide
- Underwatered Snake Plant (Sansevieria Trifasciata) - Signs And How To Fix
- How to Care for Brazilian Jasmine Plant (Mandevilla Sanderi)
- How to Grow & Care for Graptopetalum Purple Delight in Summer
- Rosa Chinensis (China Rose): Plant Growing & Care Tips
- How to Care for Baby Sun Rose (Aptenia Cordifolia)