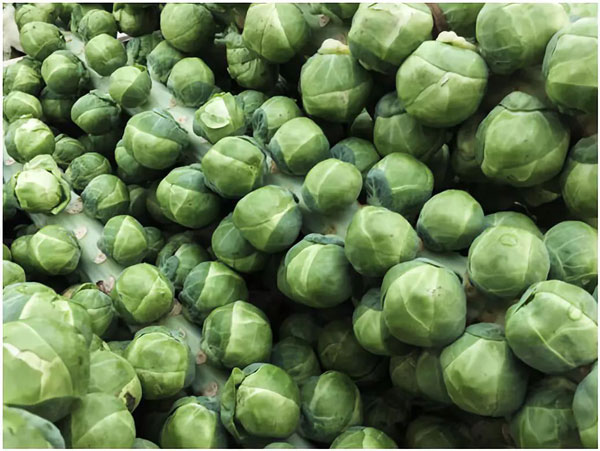
Brussels Sprouts: Grow & Care for Brassica Oleracea
Written by Iris
Aug 05 2021
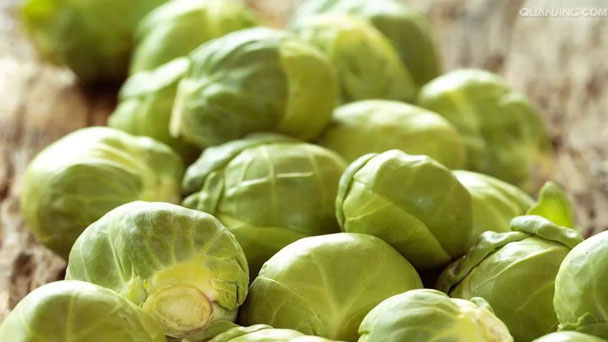
Brussels Sprouts are known as a Cole crop, being part of the same Brassica family as broccoli and cabbage. Just like the others in the family, the sprouts are best when harvested after being exposed to a light frost or two to enhance the flavor.
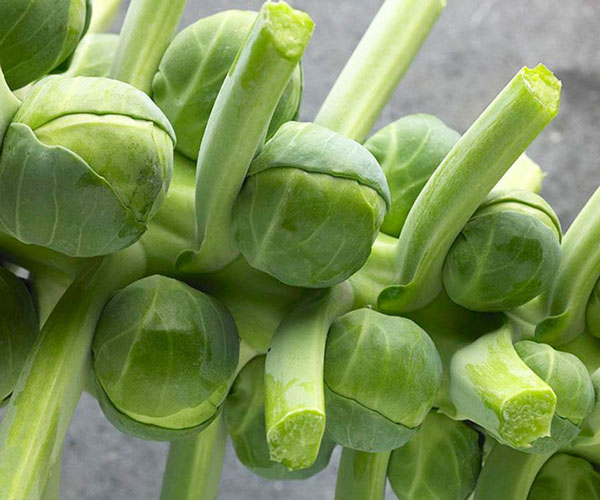
Brussels sprouts can be started as indoor seeds or planted directly into the garden. We recommend starting sowing indoors as this allows the seedlings to pre-empt and helps protect them from summer heat and pests. Direct-sown seeds can take several weeks to mature, so if you plan to plant outdoors, add 20 days to your planting date calculation.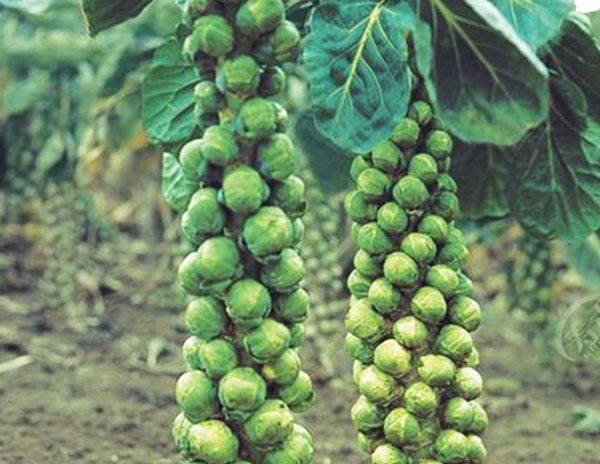
However, gardeners must ensure the get the right balance when watering. Over-watering your seedlings can also result in stunted growth, and it increases the chances of the seedlings developing root rot.
After planting your Brussel sprouts in the veggie beds, water deeply, and then let the soil dry out over the next two to three days. Allowing the soil to dry out a bit between watering helps the roots grow as they search the ground for water.
If you live in a warm climate, water your sprouts every other day. If your Brussels sprouts are grown in colder climates, twice a week is enough watering to ensure optimal growth.
Overwatering leads to waterlogging of the soil around the plant’s roots. Saturated soil eventually leads to the development of root rot and the death of your Brussel sprouts.
Nitrogen is represented by the first number you see on any type of fertilizer ex: 20-20-20. Look for a fertilizer where that first number is a bit higher than the other two. Give them a good feed every three weeks following the directions for the particular fertilizer you are using. Because brussels sprouts are such aggressive nitrogen consumers you will need to plant them in a different location each season using a 4 year crop rotation schedule.
‘Diablo’ is known as a heavy producer.
‘Falstaff’ has a red/purple hue that holds when cooked
‘Jade Cross’ is a high-yield compact plant, resistant to some diseases and known for its tolerance for hotter weather.
‘Oliver’ is an early-maturing variety with a shorter growing season requirement (80–90 days).
‘Long Island Improved’ is an heirloom and a compact plant that prefers a cool summer.
Rotate Brussel Sprout in the growing site every season. Brussel Sprout draw plenty of nutrients from the ground, so you'll need to ensure you're rotating your garden for the best results. Rotating your crops annually also helps to ensure pathogens don't overwinter in the ground and infect the following year's crop.
How to Plant and Grow Brussels Sprouts
How to Choose and Prepare a Planting SiteWhen to Grow Brussels Sprouts (Brassica Oleracea)How to Grow Brussels Sprouts (Brassica Oleracea)How to Care for Brussels Sprouts (Brassica Oleracea)Varieties of Brussels Sprouts (Brassica Oleracea)Brussels Sprouts (Brassica Oleracea) FAQ
How to Choose and Prepare a Planting Site
Choose an area of your garden that gets at least six to eight hours of direct sunlight per day. It is also ideal to grow in a cool house or greenhouse, producing large plants that produce lots of Brussels sprouts. Brussels sprouts are hardy plants that like cold climates. Some varieties do well in warmer areas, but this winter plant does best in the northern states of the United States. You need to make sure you put the plants in place in the fall to prevent wind from blowing through the long stems. Brussels sprouts like firm and nutrient-rich soil to produce tasty sprouts, and it's best to let the soil rest for at least four to six months before planting. Bean sprouts are hardy plants that will grow in most sites, but need to be placed in exposed areas in the fall to prevent being blown over in high winds.
When to Grow Brussels Sprouts (Brassica Oleracea)
To determine the best time to plant, count backwards from your first fall frost using the "Days to maturity" listed on the seed packect. Usually, this means planting Brussels sprouts about four months before your first fall frost date. In areas with cold winters, where winter temperatures are usually below freezing, sowing begins in early to mid-summer. The plants will be harvested and ripe in mid autumn or early winter. In areas with mild or warm winters where winter temperatures occasionally or rarely fall below freezing, sowing begins in mid-summer to late summer. The plants will be harvested and ripened in mid-late winter.Brussels sprouts can be started as indoor seeds or planted directly into the garden. We recommend starting sowing indoors as this allows the seedlings to pre-empt and helps protect them from summer heat and pests. Direct-sown seeds can take several weeks to mature, so if you plan to plant outdoors, add 20 days to your planting date calculation.

How to Grow Brussels Sprouts (Brassica Oleracea)
Steps for Brussels Sprouts (Brassica Oleracea) Propagation with Seeds
Brussels sprouts are best sown in a modular seedling tray and planted out 4 weeks later. Sow 1 seed per module at 2cm deep in an 84 cell plant tray. They will germinate in 7-12 days and be ready to plant out about 4 weeks later. If the plants are on a heat bench or in a propogator and they are looking spindly, turn the heat down and try to give them as much light as possible. If 2 sprouts have been germinated in any of your modules you need to remove the weaker one. Don't pull the seedling out as you'll damage the roots of the one you want to keep. Nip the unlucky one with your finger nail or cut with a scissors. Watering. It's important to keep you seedlings properly watered before you plant them out in the gartden. You are actually far better to under rather than overwater your plants. This may sound odd but making the roots serch for water helps to develop a better root system. It's a bit like keeping fit. However, you need to be careful not to let the compost plug completely dry out or it will form a crust on top and won't absorb the moisture the next time you water. It will all depend on the weather of course but on a hot day you will need to water twice a day, if it's it's dull every 2 days will be fine.How to Care for Brussels Sprouts (Brassica Oleracea)
Light
The plants will grow and sprout best in full sun and need at least 6 hours of sun daily. Too much shade will slow the sprouts' maturity.Soil
Brussels sprouts prefer fertile, well-drained soil rich in organic matter for best growth. Most soils in Utah are suitable for Brussels sprouts production. Before planting, determine fertilizer needs with a soil test and then follow the recommendations given with the test report. If fertilizer applications are warranted, work the fertilizer into the top 6 inches of soil. If you fertilize with compost, apply no more than 1 inch of well-composted organic matter per 100 square feet of garden area.Water
Never let your seedlings dry out before transplanting them into the garden. Use a misting spray bottle to ensure the soil remains moist during the germination and early establishment phase.However, gardeners must ensure the get the right balance when watering. Over-watering your seedlings can also result in stunted growth, and it increases the chances of the seedlings developing root rot.
After planting your Brussel sprouts in the veggie beds, water deeply, and then let the soil dry out over the next two to three days. Allowing the soil to dry out a bit between watering helps the roots grow as they search the ground for water.
If you live in a warm climate, water your sprouts every other day. If your Brussels sprouts are grown in colder climates, twice a week is enough watering to ensure optimal growth.
Overwatering leads to waterlogging of the soil around the plant’s roots. Saturated soil eventually leads to the development of root rot and the death of your Brussel sprouts.
Temperature and Humidity
Brussels sprouts prefer temperatures between 45 and 75 degrees Fahrenheit. They'll tolerate a couple of days below freezing, and even improve their flavor with a bit of light frost. This is not a warm-weather crop—sprouts that mature during hot or dry weather will be bitter and flimsy.Fertilizer
Like all members of the cabbage family, brussels sprouts are nitrogen hogs and to have a successful crop you will want to feed the plants with a nitrogen-rich fertilizer.Nitrogen is represented by the first number you see on any type of fertilizer ex: 20-20-20. Look for a fertilizer where that first number is a bit higher than the other two. Give them a good feed every three weeks following the directions for the particular fertilizer you are using. Because brussels sprouts are such aggressive nitrogen consumers you will need to plant them in a different location each season using a 4 year crop rotation schedule.
Pruning
If any of the lower leaves of the plant show any yellowing, at once strip them off. (By the way: the younger, tender leaves can be cooked up much like collards or turnip greens, if that’s your idea of a good time.) Some growers remove all leaves to accelerate harvest, but that practice is not essential in the home garden, and not practical for us on the farm. Some believe that the sprouts develop better if the lowermost six to eight leaves are removed from the sides of the stalk as the sprouts develop. Two or three additional leaves can be removed each week, but several of the largest, healthiest, fully expanded upper leaves should always be left intact on top to continue feeding the plant. Another practice is topping, or cuttiing off the growing tip of the plant when the sprouts are present but immature. See photo above for an example of where to cut. Some sources say that is not critical for home growers, but others swear that it is utterly essential for good production. Late August to mid September, or 3 weeks before the first harvest, is the best time to prune the tops in our region. The reason for doing it is to send the remaining energy of the plant in to sizing up your sprouts rather the in to creating new leaf growth. We do prune the tops of our sprouts in September.Pests and Diseases
- Club root
- Cabbage root fly
- Caterpillars

Varieties of Brussels Sprouts (Brassica Oleracea)
‘Churchill’ is an early maturing plant, adaptable to most climates.‘Diablo’ is known as a heavy producer.
‘Falstaff’ has a red/purple hue that holds when cooked
‘Jade Cross’ is a high-yield compact plant, resistant to some diseases and known for its tolerance for hotter weather.
‘Oliver’ is an early-maturing variety with a shorter growing season requirement (80–90 days).
‘Long Island Improved’ is an heirloom and a compact plant that prefers a cool summer.
Brussels Sprouts (Brassica Oleracea) FAQ
Do I Need to Rotate My Brussel Sprout Crop?
Brussel sprouts are an excellent crop to grow in a succession planting schedule throughout the growing season. By starting your planting in mid-March, and adding a new batch every 4-weeks, you'll have successive harvest throughout the fall and winter.Rotate Brussel Sprout in the growing site every season. Brussel Sprout draw plenty of nutrients from the ground, so you'll need to ensure you're rotating your garden for the best results. Rotating your crops annually also helps to ensure pathogens don't overwinter in the ground and infect the following year's crop.
How to Plant and Grow Brussels Sprouts
Are Brussels sprouts easy to grow?
Because of their large size, a lot of folks think sprouts are intimidating to grow, but Brussel Sprout actually require almost no care once they've been planted in the ground. These easy-to-grow plants need quite a long period of cool weather to produce. So just as long as you have the space and the right period of cool weather, they’re a breeze.How many Brussels sprouts will one plant produce?
There is no set amount for a single plant to produce—it can vary pretty widely, depending on conditions and variety—but it's not unusual for a single Brussels sprout plant to produce 3 or more pounds of sprouts in a season. That's enough for most families of four to have for three meals.
Latest Updated
- Benefits of Bugleweed - 7 Science-backed Health Benefits
- Bugleweed Dangers & Side Effects - Is It Poisonous?
- How to Plant Evergreen Trees - What You Should Know
- When to Plant Evergreens - Grow Guide for Evergreen Trees
- 12 Wonderful Evergreen Shrubs for Your Garden
- 12 Popular Evergreen Plants with Pictures for Beginners
- When And How To Prune A Lilac Bush Like a Pro
- How to Grow & Care for Lilac Vine (Hardenbergia Violacea)
- Japanese Lilac Tree (Syringa Reticulata) Care & Propagation Guide
- Shumard Oak Pros and Cons - What to Know
Popular Articles
- Winter maintenance of Antirrhinum Majus
- How to Grow Terminalia Mantaly Tree
- How to Grow and Care for Crossostephium Chinense
- How to grow Antirrhinum Majus in spring
- Peristeria Elata (Dove Orchid) Profile: Info & Care Guide
- Underwatered Snake Plant (Sansevieria Trifasciata) - Signs And How To Fix
- How to Care for Brazilian Jasmine Plant (Mandevilla Sanderi)
- How to Grow & Care for Graptopetalum Purple Delight in Summer
- Rosa Chinensis (China Rose): Plant Growing & Care Tips
- How to Care for Baby Sun Rose (Aptenia Cordifolia)
